Flash Modifiers
Flash modifiers are great and here’s why…
We all know that typical camera-flash type picture where there are harsh shadows and you can see where the light reflects off of every shiny object in the photo. It’s not a good look and it’s very obvious an on camera flash was used.
There’s a cheap and easy way to fix that though and it”ll create a warmer more natural look to your photos. Although this exact fix won’t apply to all cameras, the theory and concept behind it is simple and can be applied to anything from a point and shoot all the way up to a DSLR.
The concept of this DIY fix is to bounce the light off of a larger surface. By doing so, you get a more evenly distributed light on the subject, reducing in the harsh shadows and extreme contrast.
To make your own bounce card, you can use foil and blank white paper. Simply mold the foil to your camera’s flash. If the flash is on the front of the camera rather than the pop out variety, simply make a box, cut it in half and tape or hold it to the flash bulb.
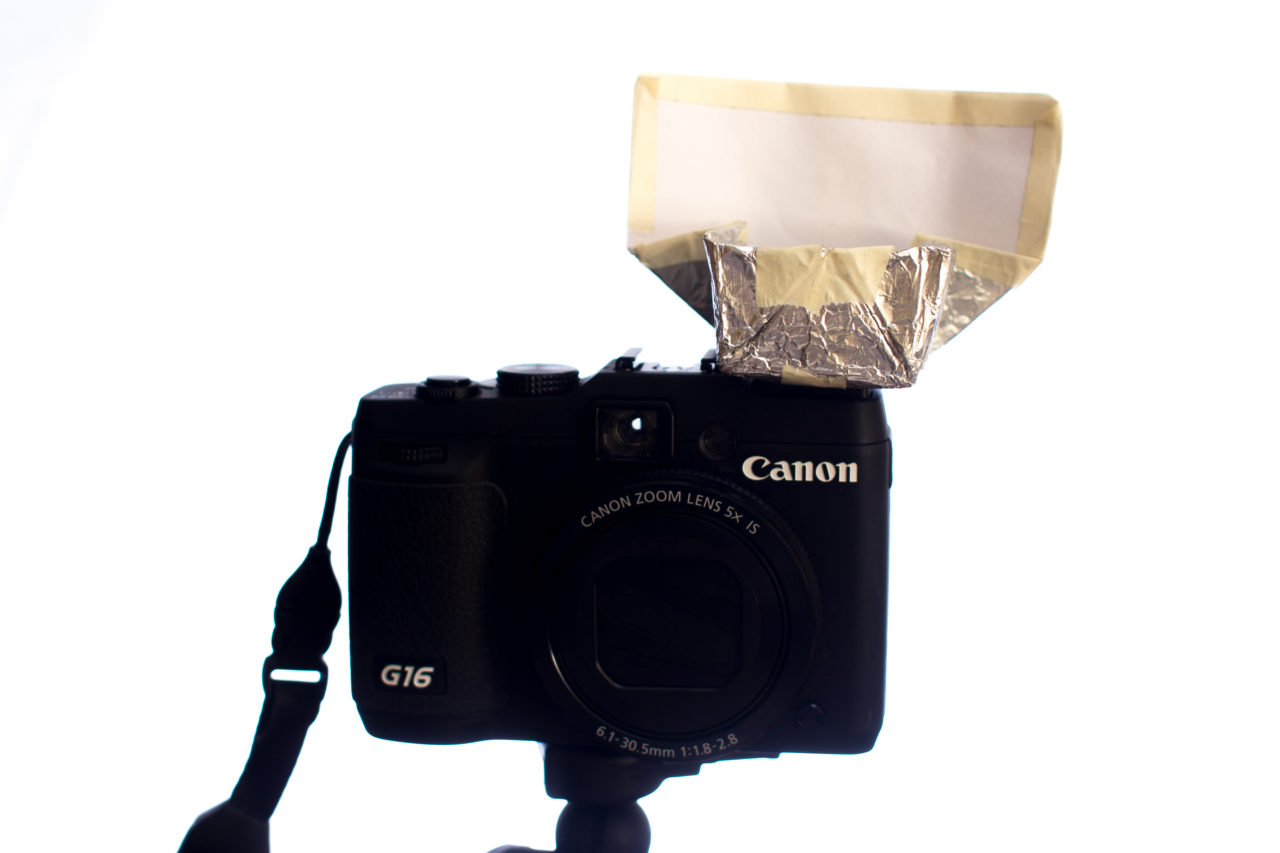
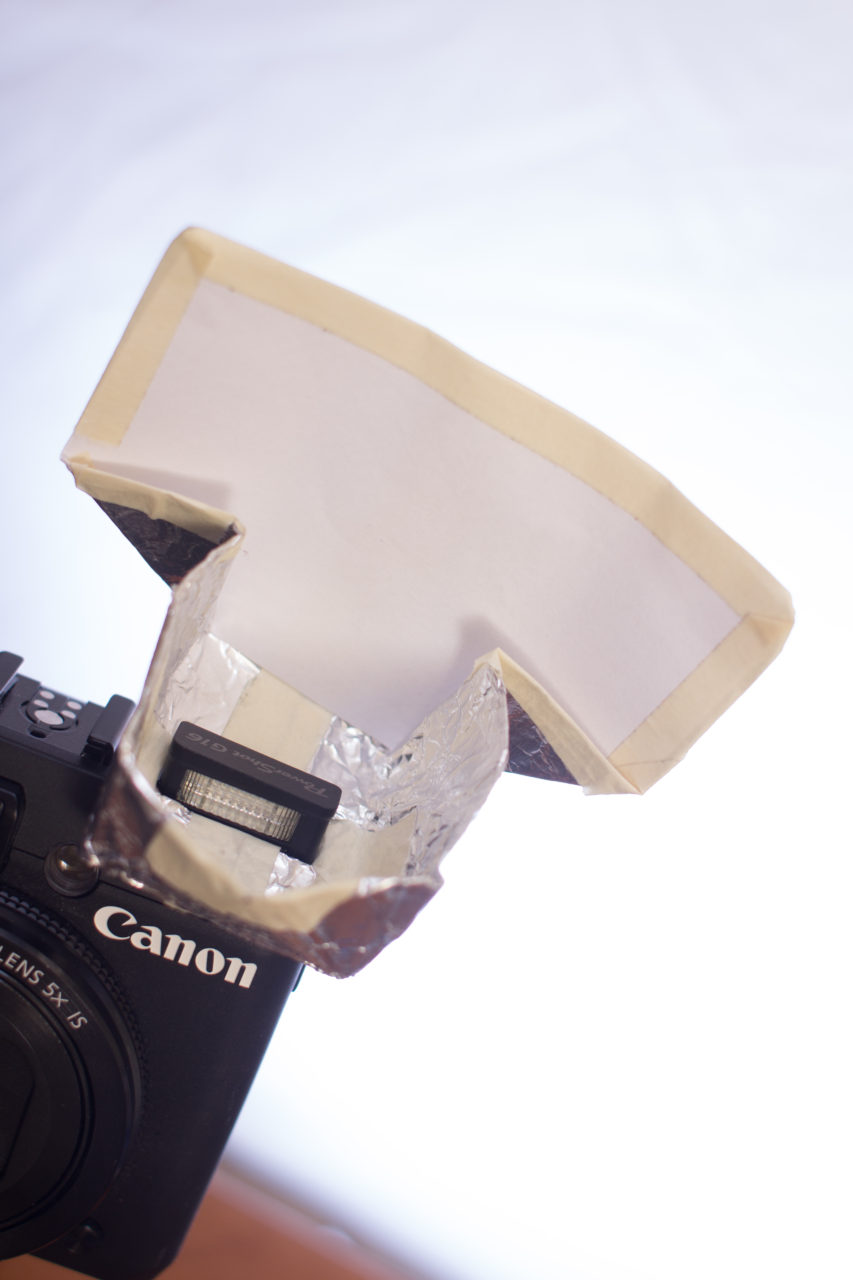
The idea is to simply redirect the light up toward the ceiling where the light will be redistributed and bounced back onto the subject. The back side of the bounce card is to reflect a small amount of light forward to help light the subject in outdoor settings however for indoor shooting, if you can make a box out of foil and simply bounce the light up toward a ceiling, it will work the same.
In a quick and crude non scientific comparison test taken at a friend’s house, you can see the differences between the use of flash and modified flash.
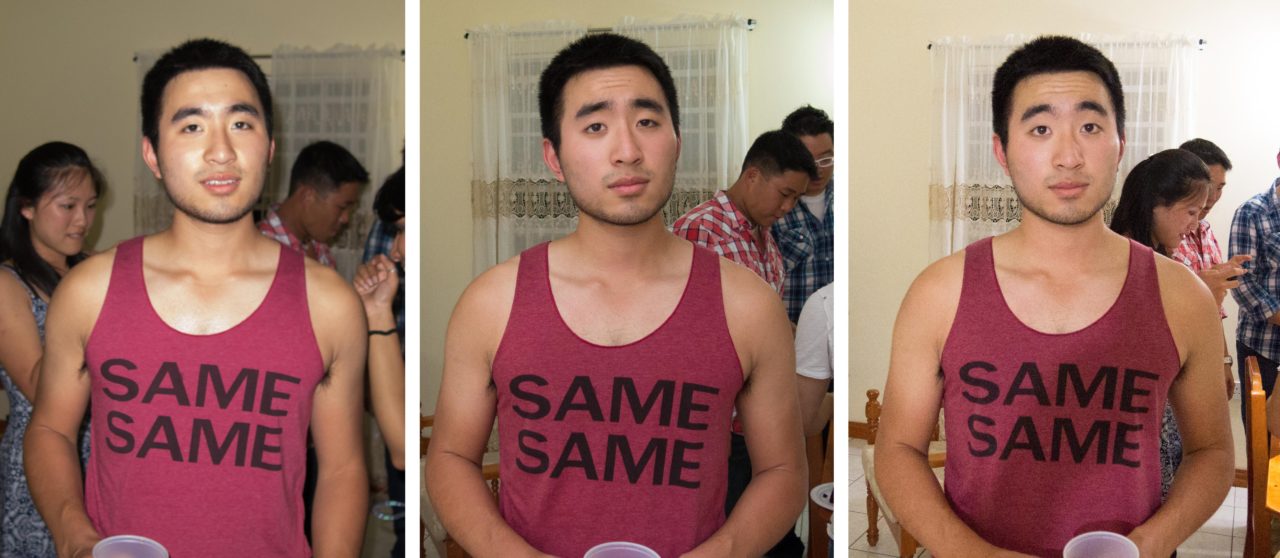
Left to Right: Flash, Modified Flash, No flash
The modified flash and no flash look similar which means in this particular scenario, both were possible but the likelihood of having shake or blurry photos increases without flash. By using flash, you also isolate your subject from the background.
Let me know if this post helped and if you have any suggestions for future topics!
Telephoto Lens Duel
This is the first time I’ve gotten a chance to compare two similar focal lengths on two different lenses so pardon the informal and amateur nature of this post however feel free to give feedback and suggestions for future ones and what you would like to see.
Before we start, I’d like you to just look at the image comparison below and decide for yourself what lens you think is better. For the purpose of this post, the left image and right image will remain respective to the same lens.
So…Left or Right?
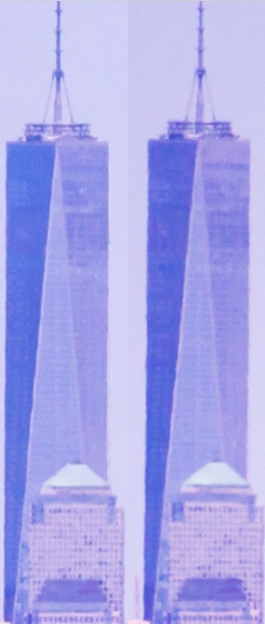
At first, I would have said the same. Most people in a normal web image file setting would probably say that too. However, upon magnification of the spire area, we can see there is a slight difference in sharpness.
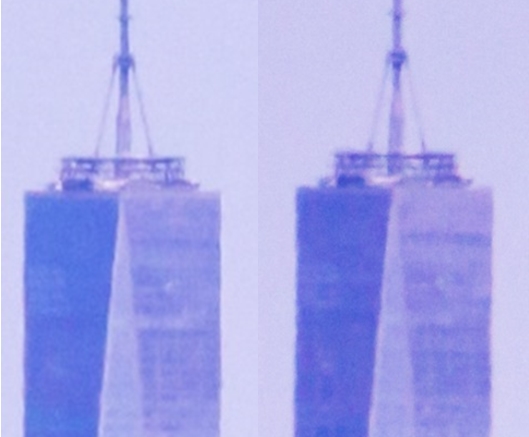
To me, it looks like the left is a bit more sharper than the right. Both images were shot in RAW as a .CR2 file and processed with the same settings in Lightroom 5.
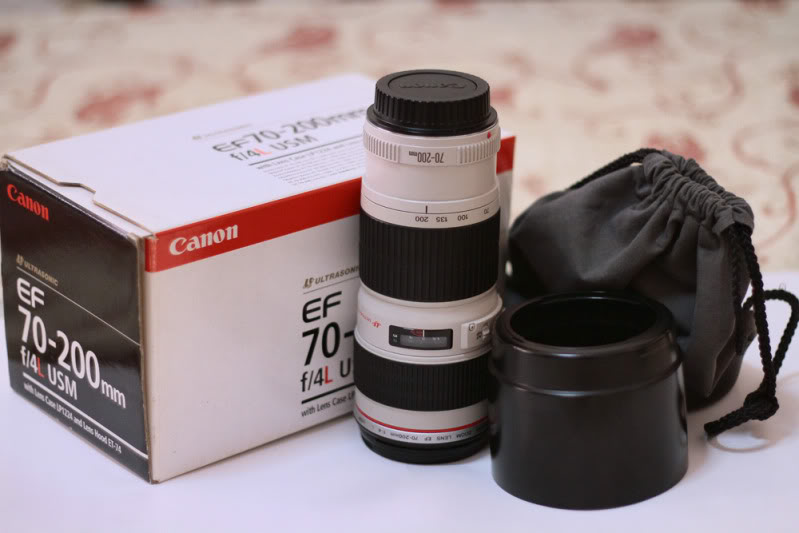
I purposely didn’t say which lenses I was comparing because there would have been bias almost immediately. The left image was taken using a Canon 70-200 f/4L while the right on a Canon 75-300 f/4-5.6. Neither lens has Image Stabilization.
ISO 400, 1/4000 sec, f/4 at 200mm and f/5.6 at 300mm respectively.
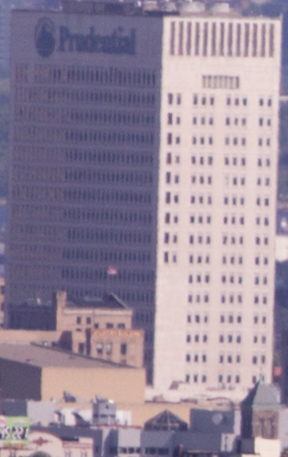
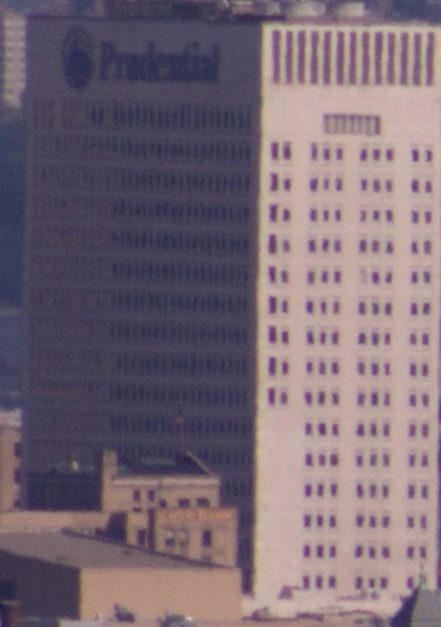
I did a few more tests across different images and concluded that the 100+% magnification of the 200 f/4L is still sharper than the 300 at 100%. Both lenses were taken at their maximum focal lengths but the glass in the 200 f/4L allowed me to crop and magnify to compensate for the extra 100mm while still remaining sharpness.
The real interesting question though and the reason why I did this test is, is the slight sharpness difference worth the $500 difference between the two lenses? You can’t go wrong with L glass but for a non-full-time or amateur photographer, I am tempted to say no. What do you all think?
 OR
OR ![canon-ef-75-300mm-f-4-5.6-usm-iii-lens-for-1100d-1000d-450d-400d-350d-d40-d30-boxed-mint-79.99-33791-p[ekm]499x374[ekm]](http://klyphoto.com/wp-content/uploads/2014/06/canon-ef-75-300mm-f-4-5-6-usm-iii-lens-for-1100d-1000d-450d-400d-350d-d40-d30-boxed-mint-79-99-33791-pekm499x374ekm.jpg?w=300)
Milky Way Post Processing
I thought it was a good idea to follow up on my initial Milky Way post with a mini video tutorial on how to process the images you take. I only intended it to be 10 minutes but got carried away and rambled through all the features instead. Hope you don’t mind. Let me know what else you’d like to see and I’ll find some time to make a video on it for you.
Taking great photographs with any camera
How To Get a Photo Like This With The Camera You Already Have
See real time how quick and painless this process is. For details follow below:
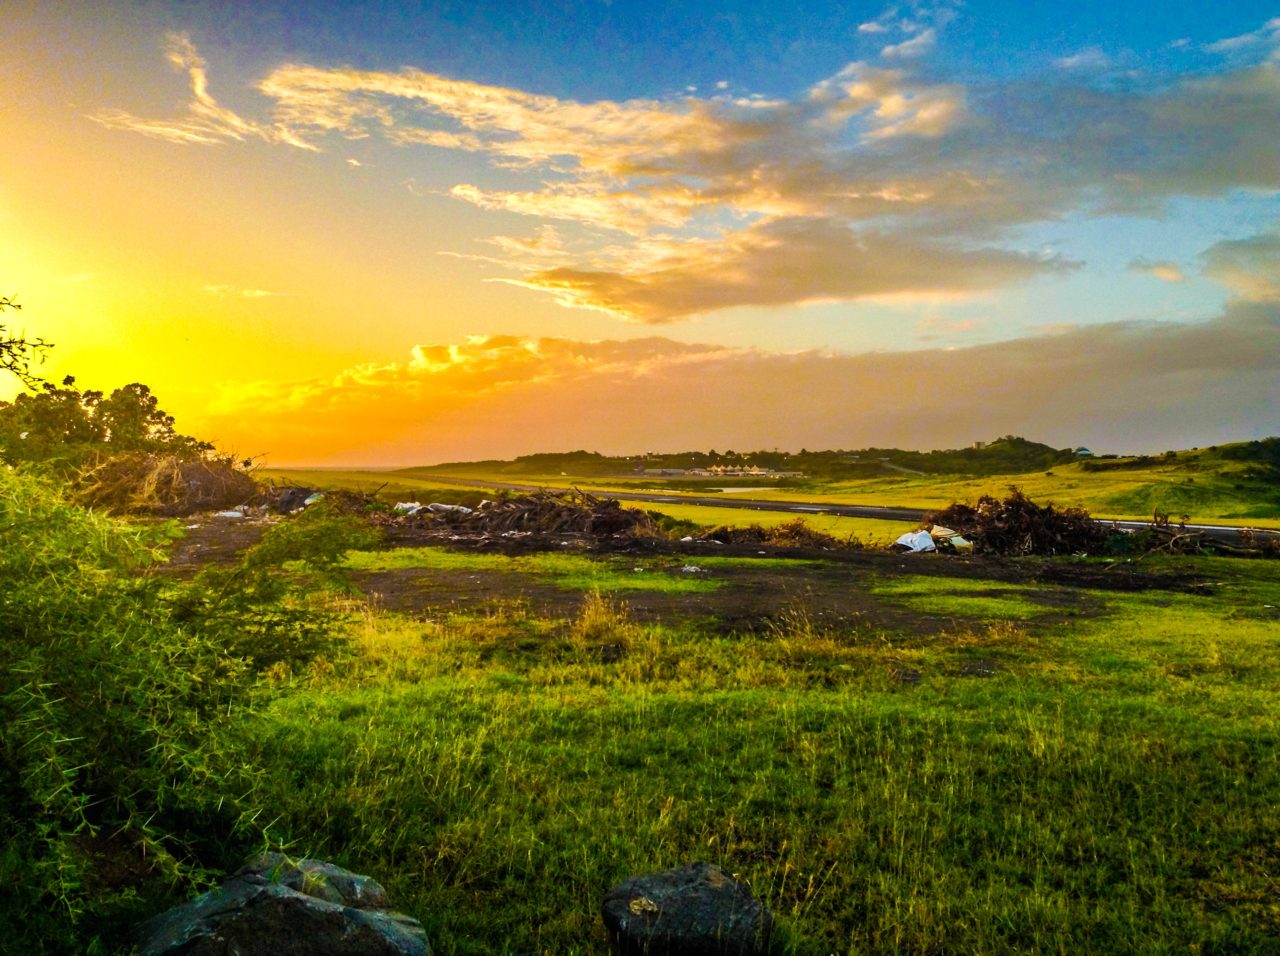
No fancy camera? No problem. In this chapter, you’ll learn how to make the use of your smartphone or point and shoot camera with no additional purchases or experience necessary. Dare I say fool proof?
To start, take out that phone or camera and take as many pictures as you can! You’ll never really know which ones end up being your greatest shots until you look back at them later. Meanwhile, enjoy the moment instead of trying to take the perfect photo.
In order to take great photographs that you can “save” or edit later, try to avoid “blowing out the image” with really bright spots. Dark spots are easier to fix in post processing but when you make an area of an image white, there is not recovering of the details. In some cases, HDR may come in handy. For the sample image used in this example, you can see that HDR brings details out of the shadows that otherwise couldn’t be seen if you used a regular camera mode.
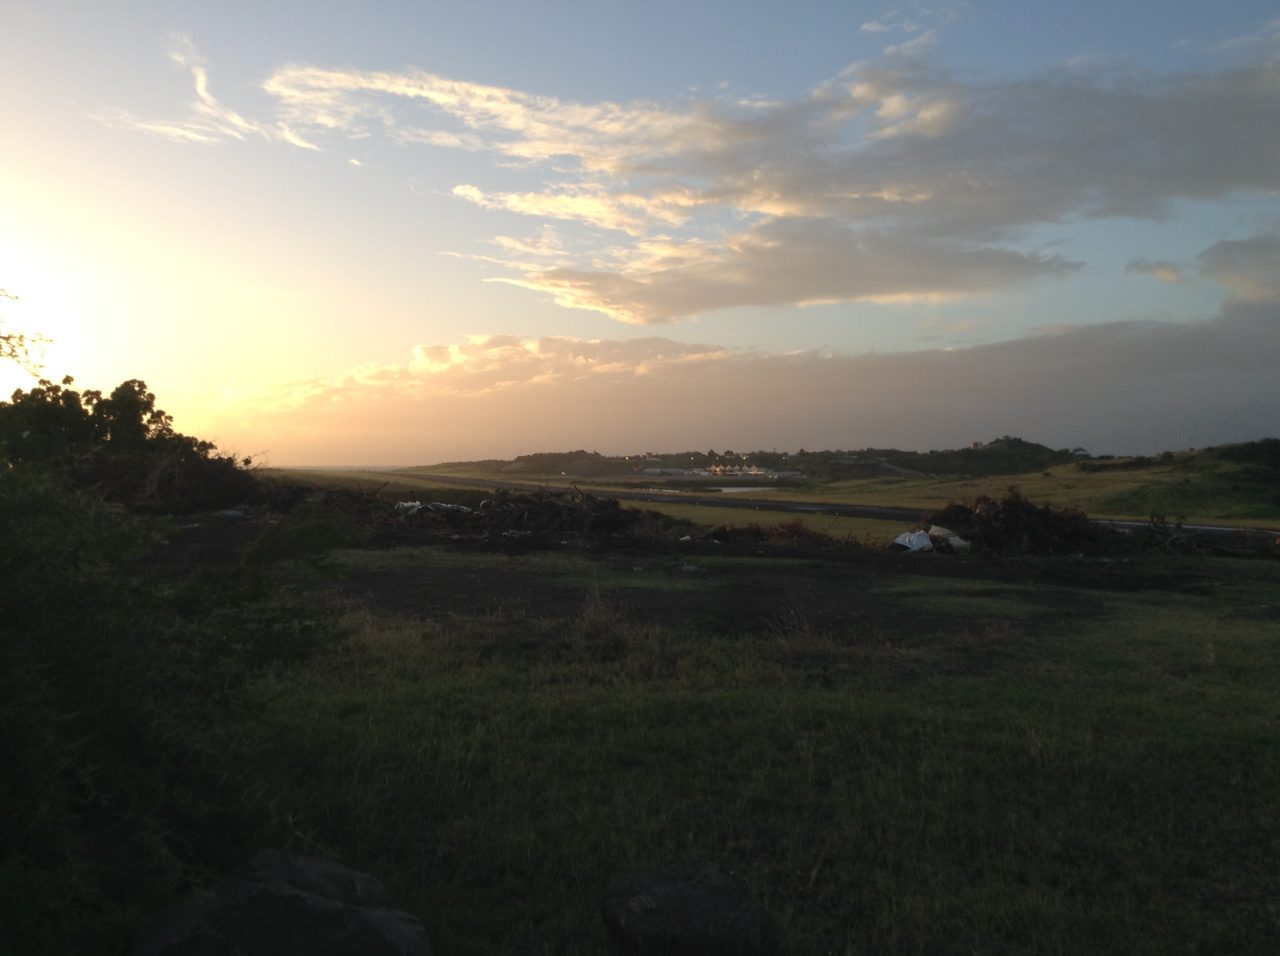
When you expose (by tapping on the screen) for the highlights, you lose some details in the shadows (darker regions)
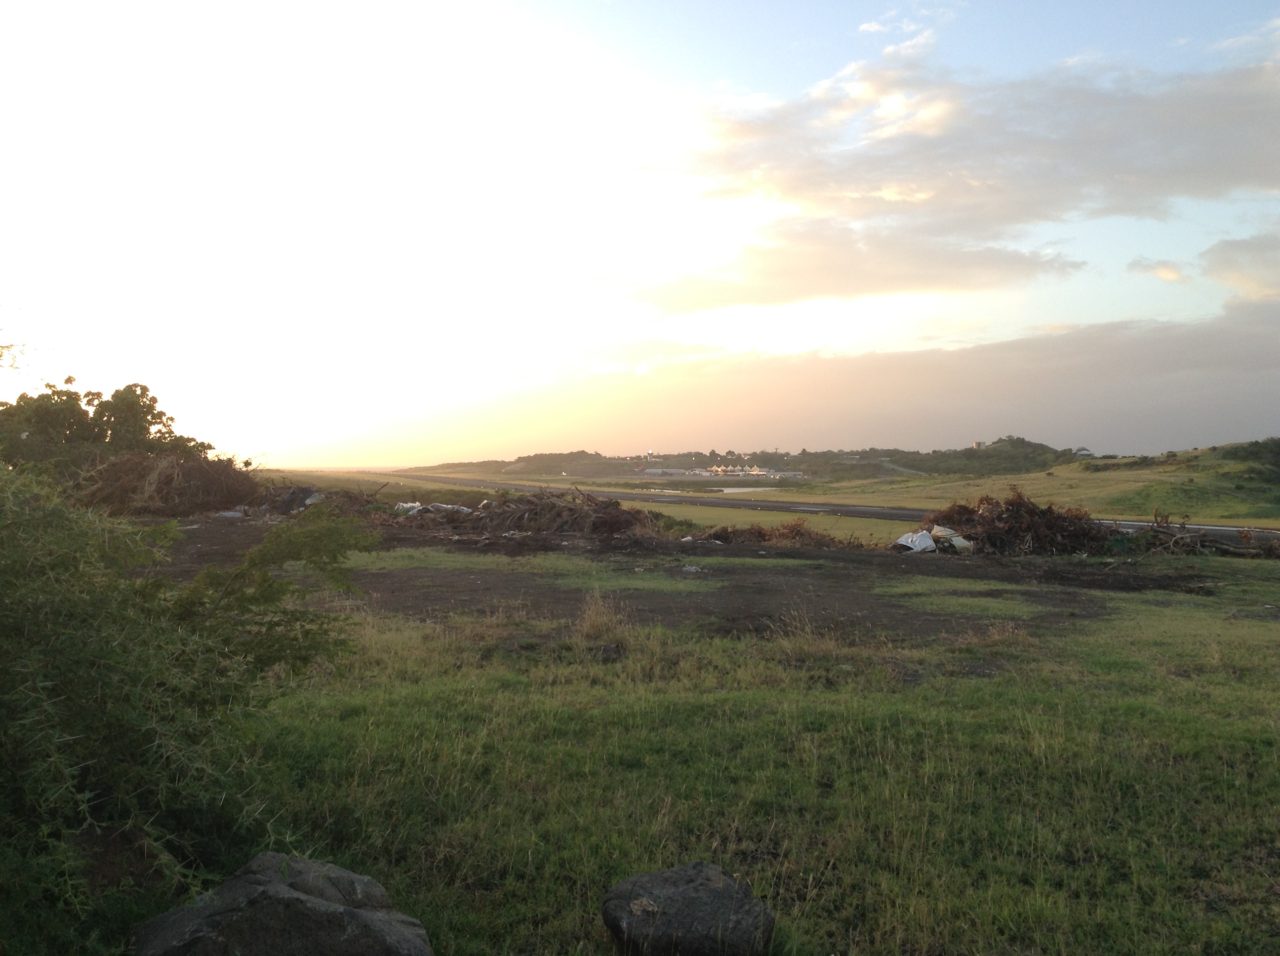
When you expose for the shadows, the camera compensates but then the sky is too bright and gets blown out, losing all the details in the clouds
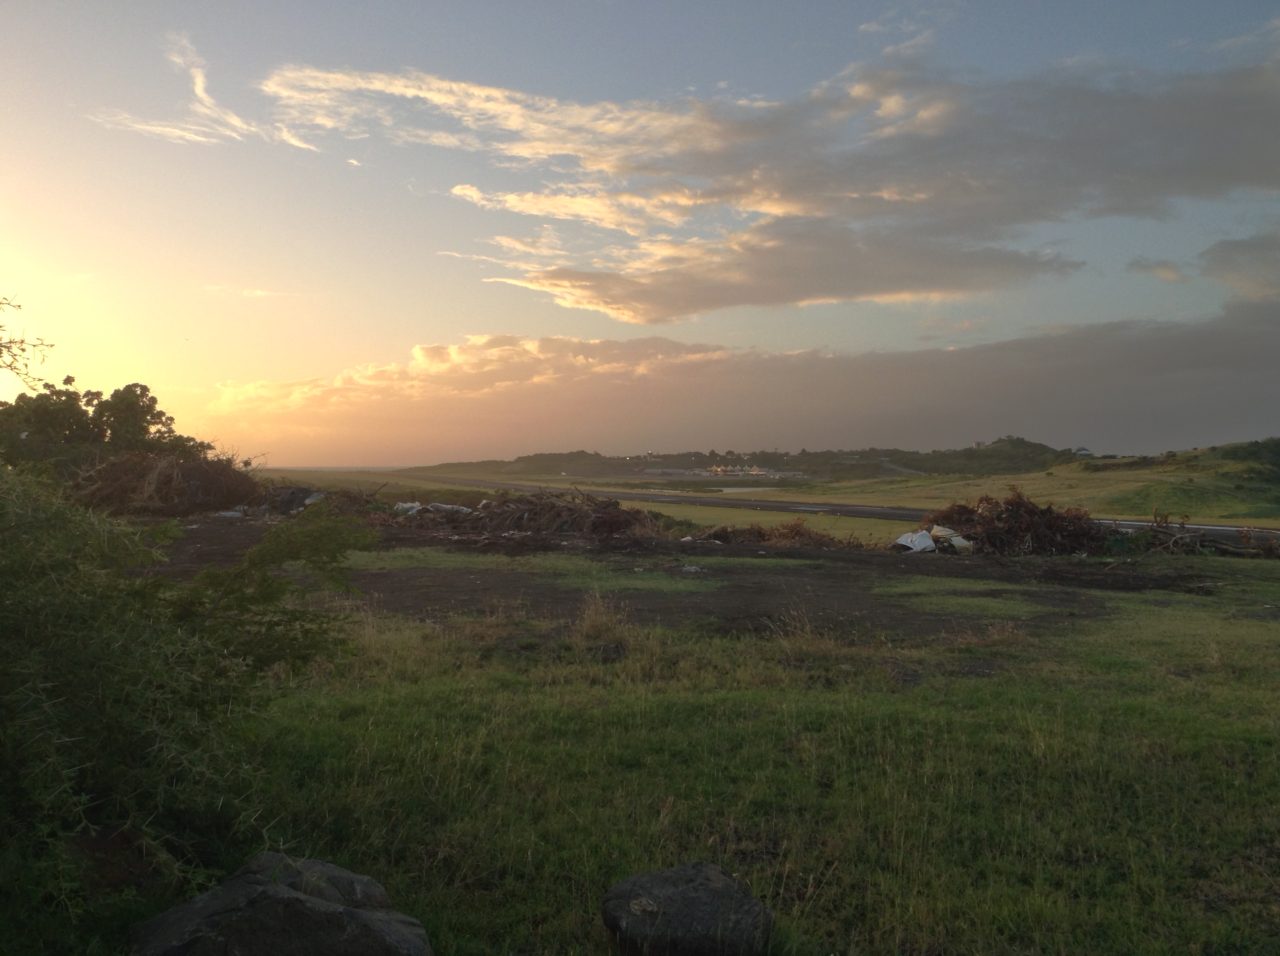
When you put your HDR mode on, the camera will take about 3 images sequentially exposing for shadows and highlights and merging them automatically to give you an image like this one, where the range of exposure is much greater (high dynamic range = HDR).
When you get home, or have some down time, pick out your best photos for a little editing to make up for the lack of high end equipment. Even professionals edit photographs so don’t feel like you’re cheating. By taking a photo with all the detail still intact, you can bring out the colors from an otherwise washed out image that camera phones tend to produce. Remember, you can’t bring out details that aren’t there so that’s why it’s important to expose the images properly when you take them, avoiding pure white spots from sunlight or bright objects.
Step 1: Download a photo editing tool. I’ll use Photoshop Express for this example because it’s FREE and it’s available on both your desktop as a free application AND an app in the iTunes App store so it caters to a wider audience. And it’s really basic and simple to use. The software is also developed by well…Adobe who obviously knows what they’re doing and uses the same technology in the mobile app as the technology that’s incorporated into their high end Photoshop and Lightroom products.
Step 2: Open the app

Step 3: Open from Camera Roll
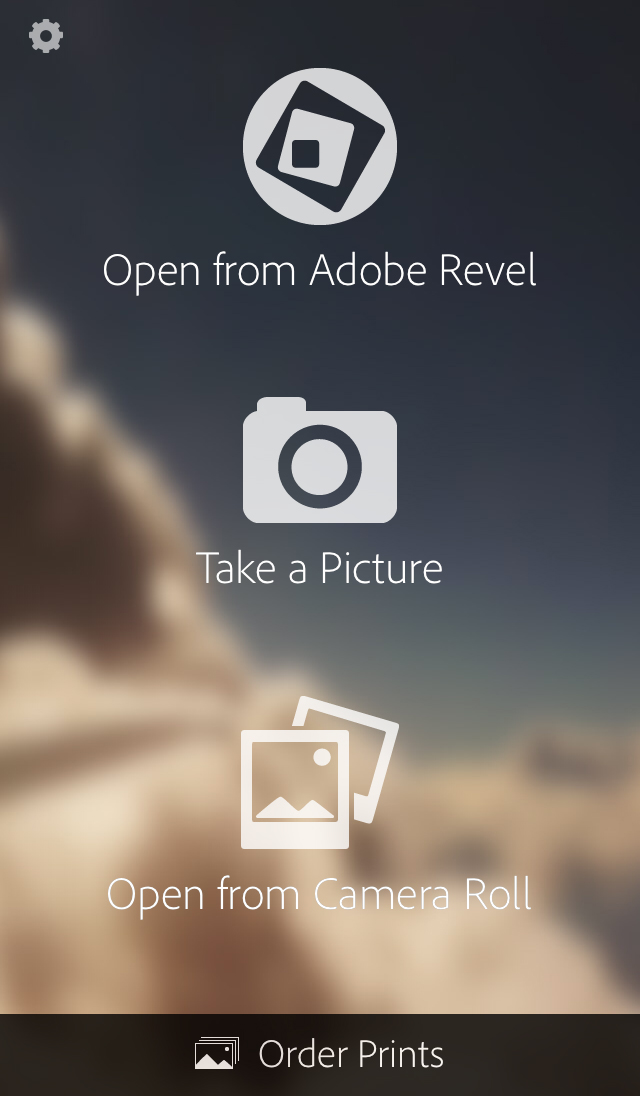
Step 4: The first screen are preset options. That’s not what we want though, however you could use it if that’s all you really needed. Let’s make our lives more complicated though and actually learn something 😉 Click on the middle button with the bars/sliders.
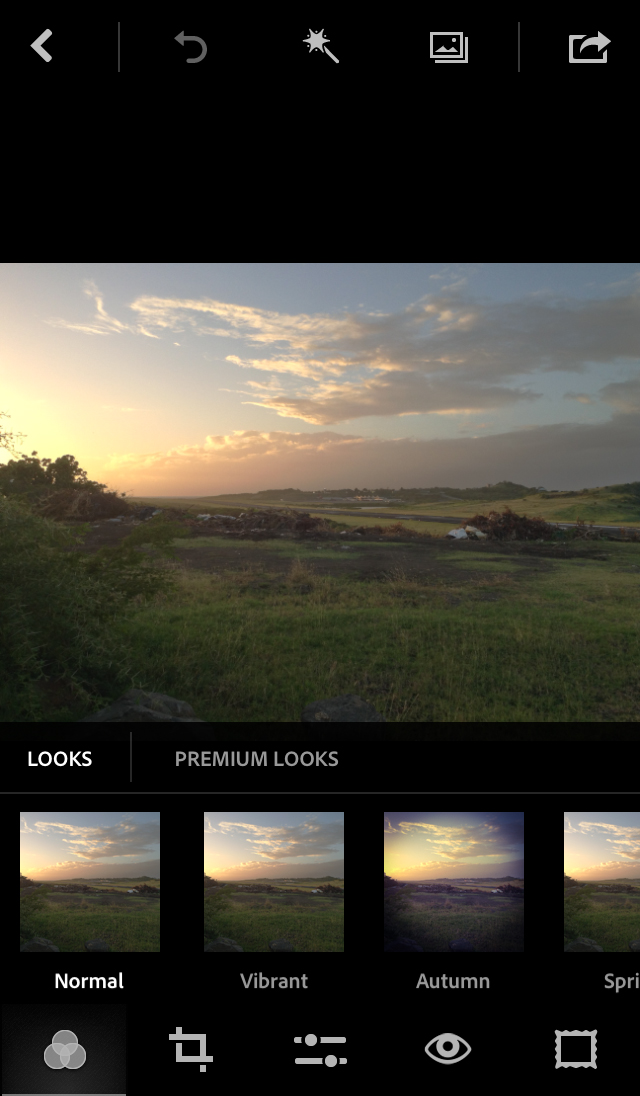
Step 5: We’re going to adjust settings manually, rather than let presets do it for you.
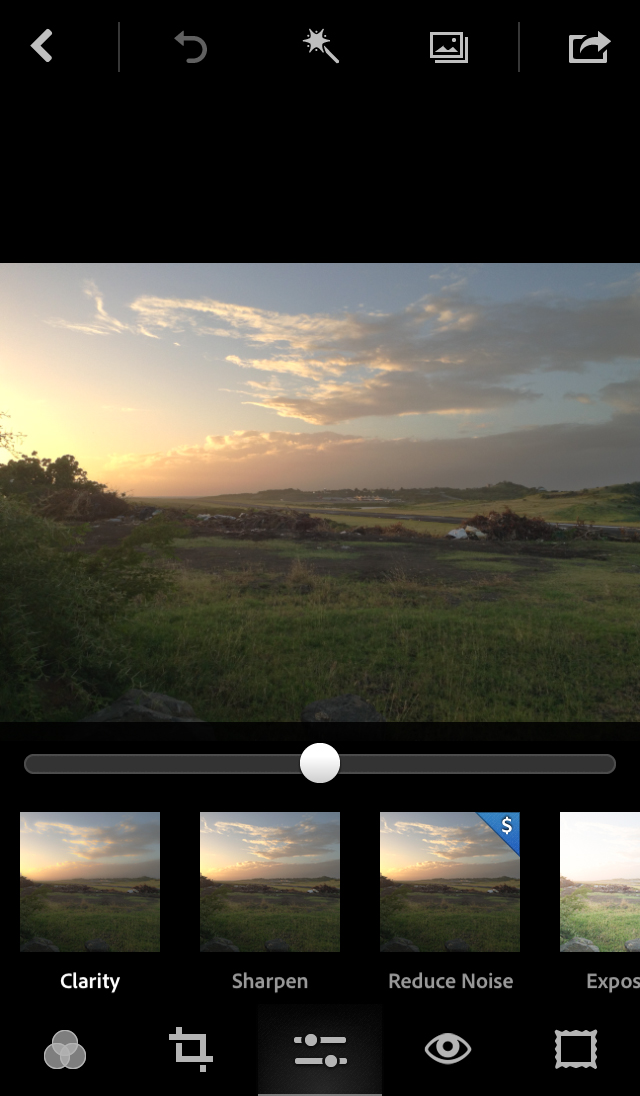
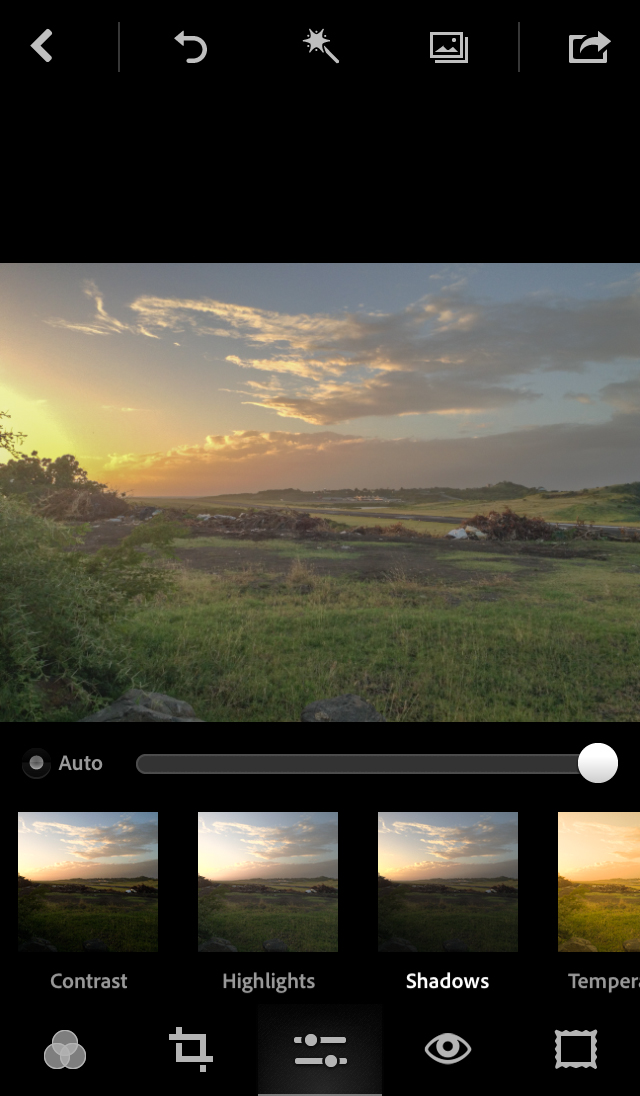
Step 6: You don’t have to follow the order I do it in but I found that this order makes more sense. First, we want to make a flat image. What that means is, you want to bring the whites and bright parts darker, and then the shadows and dark parts brighter, meeting in the middle somewhere.
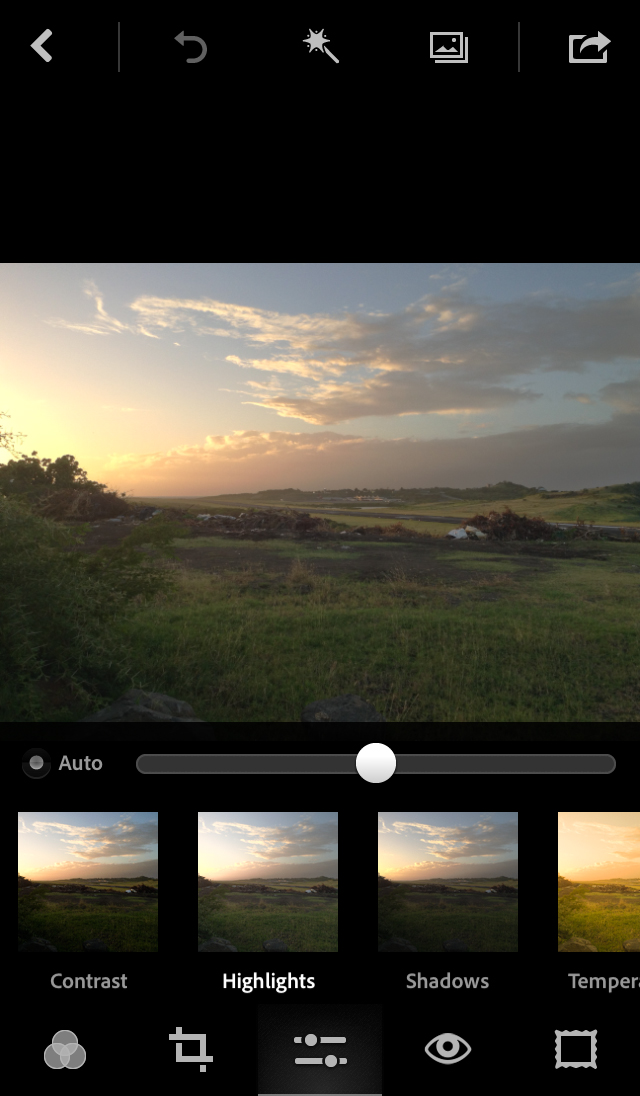
Step 7: Highlights down to 0
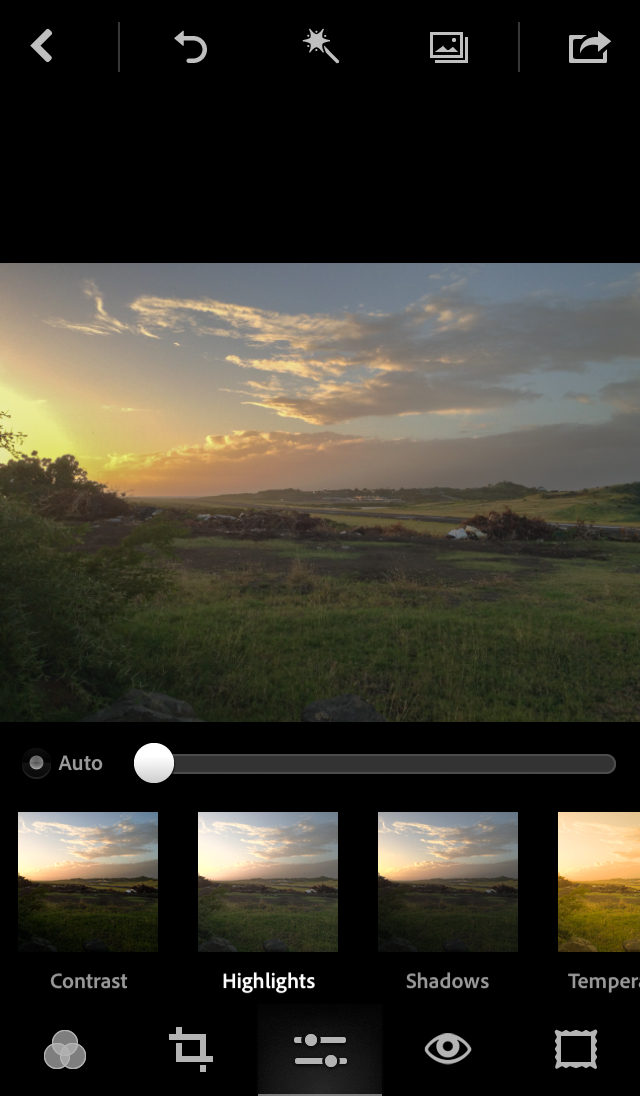
Step 8: Shadows up to 100
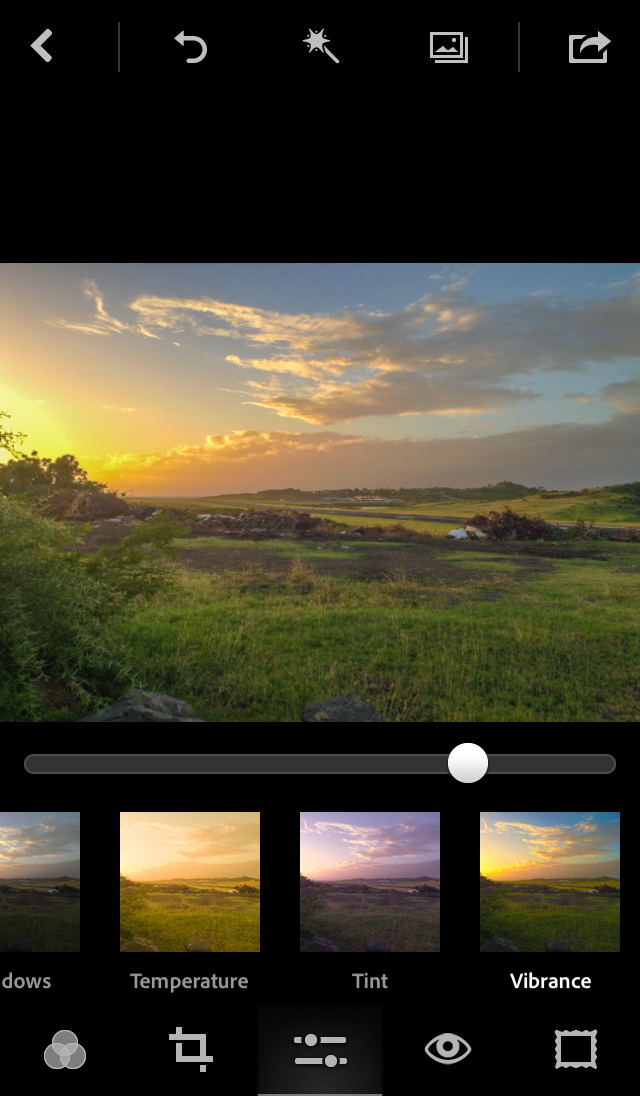
Step 9: Now we’re moving over to the fun part, bringing some of that color back. Vibrance…just think of it as a Smart Saturation. It’s Adobe’s way of dealing with saturation without just pumping up ALL the colors to create that icky crayon look. This part is subjective and varies from photo to photo. For this one, I took it up to about 60. Most times, I only bring it up to about 30 or 40. 100 never looks good though.
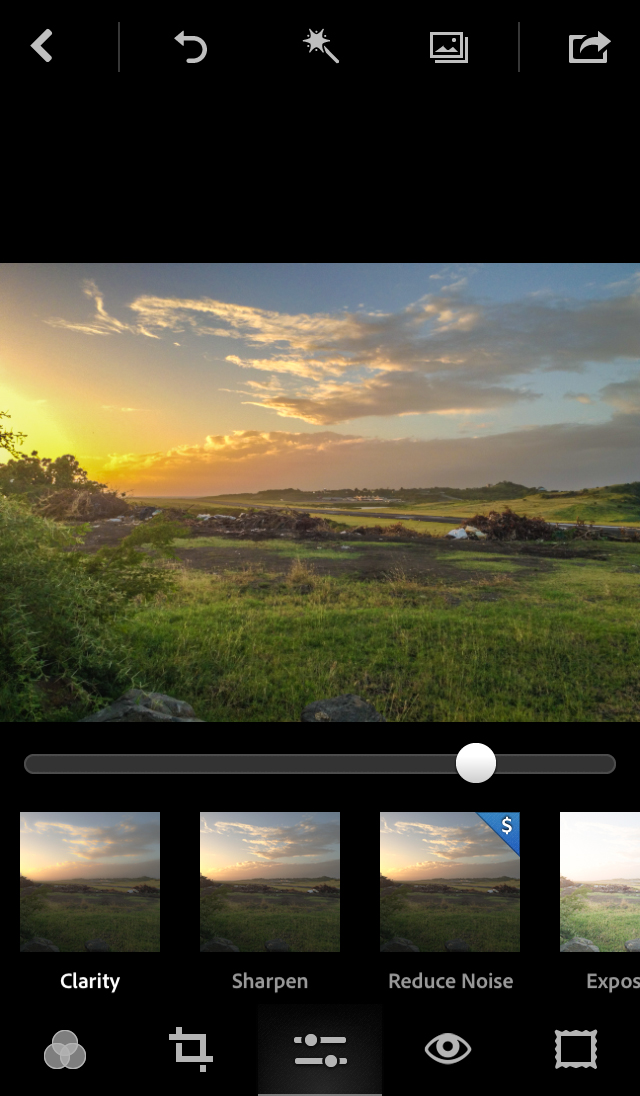
Step 10: Now that we have some color, let’s bring out some details. Clarity is like a Smart Sharpening tool. Again, Adobe’s way of sharpening edges without making things look weird. I usually go up to about 40 but do it to your taste. You don’t want to make it seem obvious so slide it up until you start noticing weird marks and artifacts.
Step 11: Remember when we made the image flat? Now we can add that range back in. By increasing the contrast, we’re taking that blob of light data that was in the middle (by bringing highlights/brights down and shadows/darks up toward the middle) and we’re stretching it out. Now you’ll start to see more of what you remember seeing with your eyes when you first took the photo.
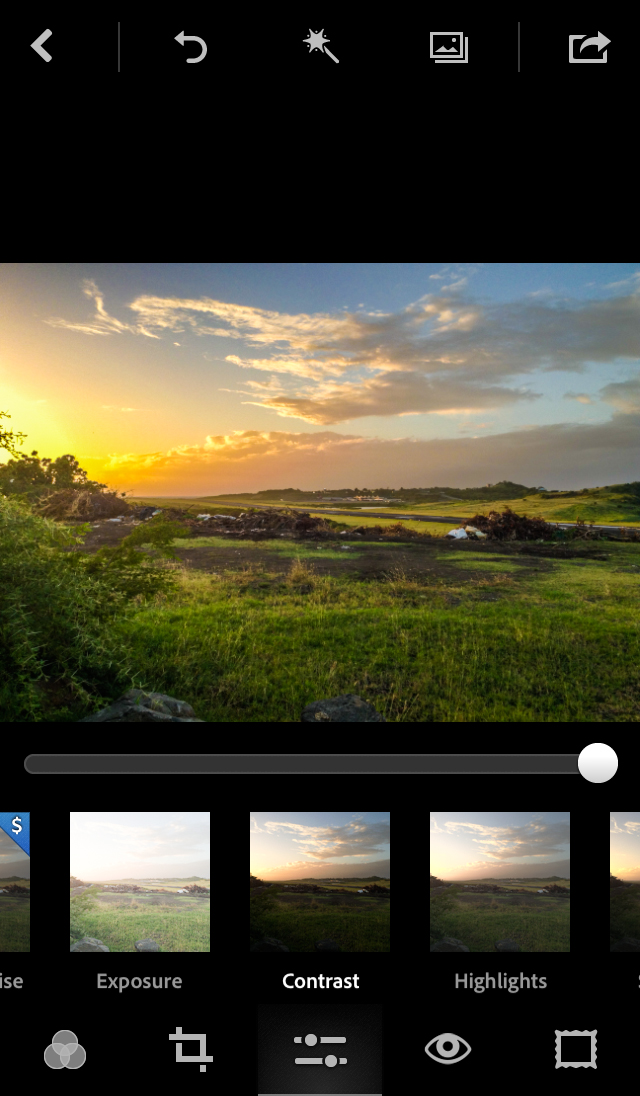
If you’re happy with what you see, that’s it! Tap on the icon on the top right and save your image, letting it load and save properly. You’ll see a message when it’s done. If not, go back through the settings and try out some that we didn’t cover such as exposure and temperature. And remember, all of this is subjective so don’t feel confined to following a strict process. Photography and photo editing is a creative process.
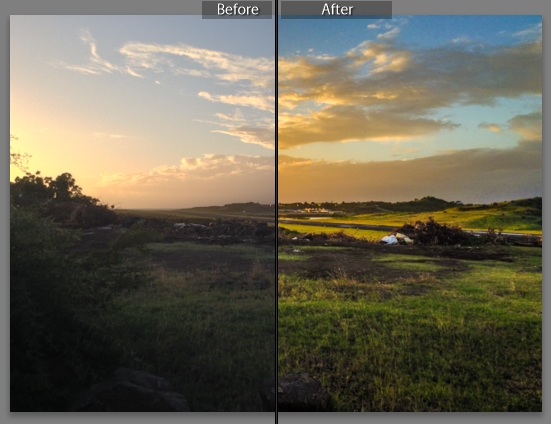
Like this tutorial? Share it with your friends and leave a comment letting me know what else you would like to learn! If you would like to see video tutorials instead or in addition to, also leave that in the comments. Thanks!
Night time scenarios
Shooting in the night time. A beginner photographer’s worst nightmare. Shaky, blurry, really dark or really bright blobs of black or white.
Let’s run through some night time basics. If you have a tripod, use if. If you don’t, turn on your image stabilization and spend some time saving up for a tripod. If you’re using a point and shoot, even a cheap dollar store 2-3 inch tripod will help you. If you’re on DSLR, you may be able to get away with sitting your camera on a ledge (carefully) or table. Do your best to reduce shake. This is pretty standard procedure across any night time scenario. Just note that the key word from this paragraph was do your best…don’t worry if it’s not ideal or perfect, we’re just trying to minimize the motion blur that normally accompanies low light situations.
For DSLR shooters, I would use the A mode and set it to as wide an aperture as possible (lowest value). This maximizes light coming into the camera. Also zoom out. Most zoom lenses have smaller maximum apertures as you zoom in. Notice your zoom lens says f/3.5-5.5 for a 18-55mm zoom lens. This means the largest aperture you can get at 55mm would be f/5.5 rather than the 3.5 at 18mm. This can make a big difference. Also don’t forget to turn your ISO up to 1600 if it isn’t already. I wouldn’t go past 1600 as the noise usually becomes a lot more evident. There are obviously exceptions which I’ll point out later on but this is a good starting point. Feel free to test and tune it to your taste.
Portraits
If you want to take pictures of people, you can rely on some flash to save you. When you use the flash, your shutter speeds can be much quicker and that minimizes the potential for shake. The flash freezes the action. You may notice that sometimes, you can get an image taken with flash that is quite good on the people or objects up close but the background lighting shows some crazy movement and crazy looking lines. That’s sometimes a good interesting look but when you’re trying to take a picture of a skyline, it’s pretty useless. That’s where the “trying your best” to stay still comes in. If you have no flash available for some reason, try standing under a street light or similar light source (you could also stand facing a restaurant or well light building). Then do the same to try to brace the camera against a wall to minimize shake.
For DSLR shooters, you could probably get away with lowering your ISO as the flash can compensate for this lack of light sensitivity.
Nightscapes…or night time landscapes
Let’s just talk about skylines as this is a pretty standard night time subject. Buildings don’t move and if you’re on a tripod or have something to rest your camera on, you’re going to want to try some long exposure settings. What is long exposure? you’re basically letting your camera sensor see things over a longer period of time so you’ll get the streaks of light of cars moving by or planes moving across the sky. They’ll come across as streaks in the final image which helps to convey some movement in a photo.
To start, make sure your camera is absolutely as stable and sturdy as possible. Because you are assuming there will be no shake, you can and should turn off vibration control or image stabilization. Sounds crazy, I know, but if you leave it on, your camera may actually INTRODUCE shake to compensate for what it assumes will be movement and we don’t want that. Also, turn your self timer on. No, we’re not taking selfies. We just don’t want our fingers to cause shake when we press the shutter button. A 2 second timer would be fine but if your minimum is 5 or 10 seconds, that’s fine too.
Now to get to the settings. Because this is a landscape, you want as much depth of field as possible aka, no blurry backgrounds. In Aperture priority or A mode, turn it to f/22. Your ISO can be turned down to 100 but I tend to leave mine at 400 or 800 because sometimes there’s not enough light to make a good shot. That brings me to my next point. Every DSLR has a light meter. That’s the -3, -2, -1, 0 , 1, 2, 3 you see in your viewfinder or on your screen. Most people have no idea what that’s there for or what it actually tells you but now you’re going to learn. It’s meant to be used for exposure compensation (notice how you can adjust it so the tick mark moves away from the 0 in either direction. The 0 is what the camera thinks you need in terms of getting a properly lit image, while +1 would mean you are 1 stop above and therefore overexposed and -1 would mean 1 stop underexposed. Don’t worry too much about the meaning of stops for now. Now it also tells you the resulting exposure of the image at your current settings. Let me explain some more…If you adjust your A to f/22 and your ISO is at 100. There is a good chance your camera will adjust your shutter speed to 30 seconds and then start blinking. This means 30 seconds is not enough time to create a good exposure. You will also notice that your exposure compensation/light meter has a tick mark that is no longer at the 0 marker. It may be much lower, either at -3 or -2 and so on. This means you won’t be getting enough light even at ISO 100. To fix this, increase your ISO.
Now ideally, you should be able to capture a decent image with some nice blur in the moving clouds while maintaining some sharp lines on buildings with nice reflections. Remember if you have trouble with your focusing at night, turn it to manual and just set things to infinity. The f/22 setting should eliminate any noticeable focusing issues since mostly everything will be in focus anyway.


